
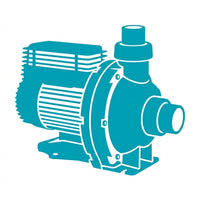
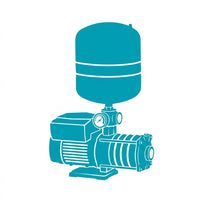


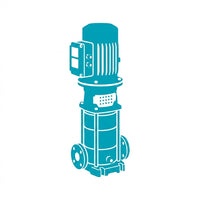


A pump controller can turn a reliable pump into an unreliable water system if it is installed in the wrong position, connected to unsuitable pipework or wired incorrectly. Knowing how to install pump controller equipment properly matters whether you are setting up domestic pressure water, garden irrigation, tank transfer or a small farm supply.
This guide covers the common electronic pump controller fitted to the discharge side of a surface pressure pump. These units start the pump when water is demanded and stop it when flow ceases, often providing dry-run protection. Bore pump control boxes, variable-speed drives and three-phase control panels require a different installation approach and should be specified for the pump and application.
Confirm the controller suits the pump and application
Before mounting anything, check the controller's electrical and hydraulic ratings against the pump nameplate. The controller must be rated for the pump's voltage, phase and running current. A controller that is undersized for the motor can overheat, trip repeatedly or fail prematurely.
Also check the maximum operating pressure. This is particularly important where a high-head multistage pump is used, or where mains pressure may be present in a changeover arrangement. The pump's shut-off pressure must remain below the controller's maximum pressure rating.
Most electronic controllers work best with clean water and a correctly primed surface pump. They are not a substitute for a suitable pressure tank and pressure switch in every application. A conventional pressure system is often the better choice where there are frequent small draws, long irrigation cycles, low flow requirements or a need to reduce pump starts.
For a bore, sump or sewage pump, select controls designed for that duty. Float switches, level controls, motor protection and dry-run sensing may be needed instead of, or in addition to, a standard pressure controller.
Isolate power and prepare the pipework
Turn off the pump circuit at the switchboard, isolate it and confirm that the supply is dead before work begins. Electrical installation and final connection must be completed by a licensed electrician in accordance with applicable Australian electrical requirements. Water and electricity are not a DIY combination.
Depressurise the plumbing and drain the relevant section of pipe. If the pump has been operating, allow it to cool first. Have the controller instructions on hand, as port orientation, cable entry and reset procedures vary between models.
The pipework should be clean, adequately supported and aligned before the controller is fitted. Do not use the controller body to pull misaligned pipe into place. Side load, vibration and the weight of unsupported pipe can crack housings or cause leaks around threaded ports.
Use thread sealant suited to the pipe material and potable water where required. Avoid applying excessive tape or sealant, as loose material can enter the controller and interfere with its internal non-return valve or flow sensor.
Mount the pump controller in the correct position
Install the controller on the pump discharge line, after the pump outlet. The flow arrow on the controller must point in the direction of water travel. Reversing it is a common cause of no-start, no-stop and flow sensing faults.
Mount it upright where the manufacturer requires this orientation, usually with the control housing above the waterway. This helps the internal components operate correctly and reduces the chance of trapped air affecting performance.
Place the controller as close to the pump as practical, while leaving enough access to inspect the display, reset button and cable connections. It should be protected from direct weather, flooding, chemical exposure and physical damage. If installed outdoors, use a suitable weatherproof enclosure or location without blocking ventilation or access.
A full-bore isolation valve on the delivery side is useful for servicing, but do not install a valve between the pump and controller unless the manufacturer specifically permits it. Closing a valve in that location can create abnormal pressure conditions. If a valve is fitted after the controller, make sure it cannot be shut while the pump is operating against a closed outlet for extended periods.
Check the suction side before commissioning
A pressure controller cannot fix a suction problem. For tank-fed surface pumps, ensure the suction pipe is airtight, correctly sized and fitted with an appropriate foot valve or non-return valve where required. Even a small air leak can cause loss of prime, surging, dry-run alarms and repeated restarting.
The water source must provide enough flow for the pump. A controller with dry-run protection may stop the pump if a tank runs low, but it does not make an undersized rainwater supply or blocked inlet work properly.
Wire the controller safely
Most electronic pump controllers have separate terminals for incoming supply and outgoing pump supply. Connect supply active, neutral and earth to the marked input terminals, then connect the pump cable to the marked motor or output terminals. Never assume terminal positions are identical across brands or models.
The circuit needs appropriate protection, including correctly selected circuit breakers and safety switching. The pump, controller and all metalwork that requires it must be effectively earthed. If the installation includes a rainwater changeover device, generator supply or solar inverter, the electrical design needs additional care to prevent backfeed and unsafe switching arrangements.
Keep cable glands tight and use cable of the correct type and size for the pump load and installation environment. Outdoor cables need UV-resistant protection and should be supported so their weight does not bear on controller terminals. Do not run low-voltage sensor wiring in the same way as mains wiring unless the equipment instructions allow it.
Prime, start and test the system
Prime the pump exactly as directed by its manufacturer before energising it. Open a tap or outlet downstream of the controller so air can escape and the pump has an immediate demand to respond to.
Restore power and use the controller's start or reset button if required. The pump should start, deliver a steady flow and purge air from the line. Once the water runs clear and free of air bursts, close the outlet. The controller should stop the pump after its designed delay.
Run this test more than once. Open a tap, observe prompt pump start, then close it and confirm the pump stops. Check every threaded joint, union and valve for leaks while the system is pressurised.
If the pump does not stop, look for a leaking tap, toilet cistern, irrigation solenoid, pipe leak or faulty non-return valve. A small ongoing leak can keep the controller sensing flow and cause continuous running. If the pump starts and stops repeatedly with no water use, investigate pressure loss, trapped air and incorrect controller selection before replacing parts.
Common installation faults to avoid
The most frequent issues are simple but costly: installing the unit backwards, using a controller with inadequate current or pressure capacity, failing to prime the pump, and mounting it where it is exposed to water or heat. Poor suction pipework is another major cause of call-backs, particularly on rainwater systems.
Avoid fitting a pressure controller where the pump must operate at a very low or variable flow outside the controller's sensing range. Drip irrigation, small float valves and long lines can produce flow conditions that prevent reliable shut-off. In these cases, a pressure tank system or a purpose-designed control arrangement may deliver more dependable operation.
Do not bypass dry-run protection or repeatedly press reset without finding the reason for the fault. The controller is responding to a condition that can damage the pump, such as no water supply, blocked suction, closed valves or a failed pump seal.
When to get technical advice
A straightforward single-phase rainwater pressure pump can often be planned easily, but the application becomes more complex when there is a bore, multiple pumps, long pipe runs, fire protection, irrigation zoning, high pressure or three-phase equipment. The right controller depends on pump curve, duty cycle, source yield, pipe losses and the control outcome required.
Foundation Pumps can assist with matching pumps, controllers and associated fittings to the application before installation begins. That is usually less expensive than diagnosing nuisance trips, short cycling or premature motor failure after the system is live.
A properly installed controller should disappear into the background: the tap opens, water arrives, and the pump stops when the work is done. If the system cannot do that consistently during testing, correct the installation before relying on it for daily water supply.